You have spent the last few months behaving like a helicopter parent to a leafy green teenager. You have obsessed over pH levels, panicked at the sight of a single yellow leaf, battled pests that seemed to manifest out of thin air, and perhaps even rigged up a backup power solution to keep the lights on during load shedding. You have poured your heart, soul, and a fair amount of cash into the soil. Now, you are staring at a canopy of glittering, aromatic flowers, and you think the hard work is over. Oh, sweet summer child, sit down. The hard work is only just beginning.
Growing cannabis is an art, but processing it is a science. The journey from soil to smoke is a marathon, not a sprint, and unfortunately, many eager growers trip over their own shoelaces right at the finish line. There is nothing quite as heartbreaking as taking a beautiful, frosty cola and turning it into something that smells like damp hay and tastes like disappointment because you rushed the drying process or mishandled the buds. Respecting your homegrown harvest means carrying that same diligence you had during the vegetative stage all the way through to the moment you spark up.
To ensure your stash retains maximum potency, robust flavour, and that bag appeal we all secretly crave, you need to navigate the post-harvest minefield with care. Here is your definitive guide to the dos and don’ts of handling your harvest, ensuring that your homegrown hero doesn’t become a homegrown zero.
The Harvest: Patience is a Virtue (and a Necessity)
DO: Wait for the Trichomes to Talk
Your plants will tell you when they are ready, but you have to know how to listen. Or rather, look. The biggest mistake novice growers make is chopping too early because they are excited, or chopping too late because they kept waiting for ‘just a little more bulk.’ Get yourself a jeweller’s loupe or a digital microscope. You are looking at the trichomes—those tiny mushroom-shaped resin glands coating the buds. Clear trichomes are immature; they will give you a racy, paranoid buzz and weak flavour. You want to see a sea of milky white plastic-looking heads, with about 10% to 30% turning amber. This balance ensures peak THC levels while introducing enough CBN for a rounded, enjoyable high.
DON’T: Manhandle the Merchandise
When you decide it is Chop Day, treat your plants like they are made of antique glass. Every time you squeeze a bud to see how dense it is, you are bursting trichome heads. Those ruptured glands release volatile terpenes into the air—which smells lovely in the moment but means less flavour in your jar later. Handle the plant by the stems only. If you must touch the flowers, wear powder-free nitrile gloves. Finger oils are the enemy of pristine cannabis. Furthermore, rough handling can bruise the plant material, leading to faster degradation and a harsher smoke.
Drying: The Slow and Low Approach
DO: Control Your Environment
Drying is not just about removing water; it is a chemical process where chlorophyll breaks down. If this happens too fast, the chlorophyll gets trapped, giving your weed that dreaded ‘freshly cut lawn’ smell and a harsh, grassy taste. You want a dark room (light degrades THC) with good air circulation but no direct fan breeze on the buds. Aim for the ’60/60′ rule if you can: 60 degrees Fahrenheit (about 16°C) and 60% relative humidity. This allows the moisture to leave the plant slowly and evenly from the centre of the stem outward.
DON’T: Speed Dry Your Stash
We have all heard the horror stories. Putting buds in the oven? The microwave? Placing them on top of a radiator? Please, for the love of the plant, do not do this. Speed drying destroys terpenes and cannabinoids instantly. You are essentially cooking your weed before you smoke it. If you are desperate to test your harvest, accept that a quick-dried sample will taste awful and give you a poor representation of the final product. Patience pays off in smoothness and potency. If the stems snap cleanly rather than bending, you are ready for the next step. If they bend, let them hang.
Trimming: The Art of the Manicure
DO: Invest in Proper Tools
Trimming is often referred to as ‘trim jail’ for a reason. It is tedious, sticky, and takes forever. However, using the wrong scissors makes it infinitely worse. Get spring-loaded micro-tip pruning shears that save your hand muscles. Keep a cup of rubbing alcohol nearby to clean the scissor hash off your blades every few minutes. Decide whether you are ‘wet trimming’ (trimming immediately after harvest) or ‘dry trimming’ (trimming after the drying process). Dry trimming is generally preferred for connoisseur-grade cannabis as the sugar leaves protect the bud during drying, allowing for a slower cure and better terpene preservation.
DON’T: Shave the Bud
There is a fine line between a well-manicured bud and a shaved poodle. Do not dig deep into the flower to remove every single micrometre of sugar leaf. You risk damaging the calyxes and reducing the overall yield. Conversely, don’t be lazy and leave long stems or large fan leaves attached. It is about aesthetics and smoke quality; leafy buds burn hotter and harsher. Find the balance where the natural structure of the flower is revealed without looking like it has been attacked by a weed whacker.
Curing: Where the Magic Happens
DO: Burp Your Jars
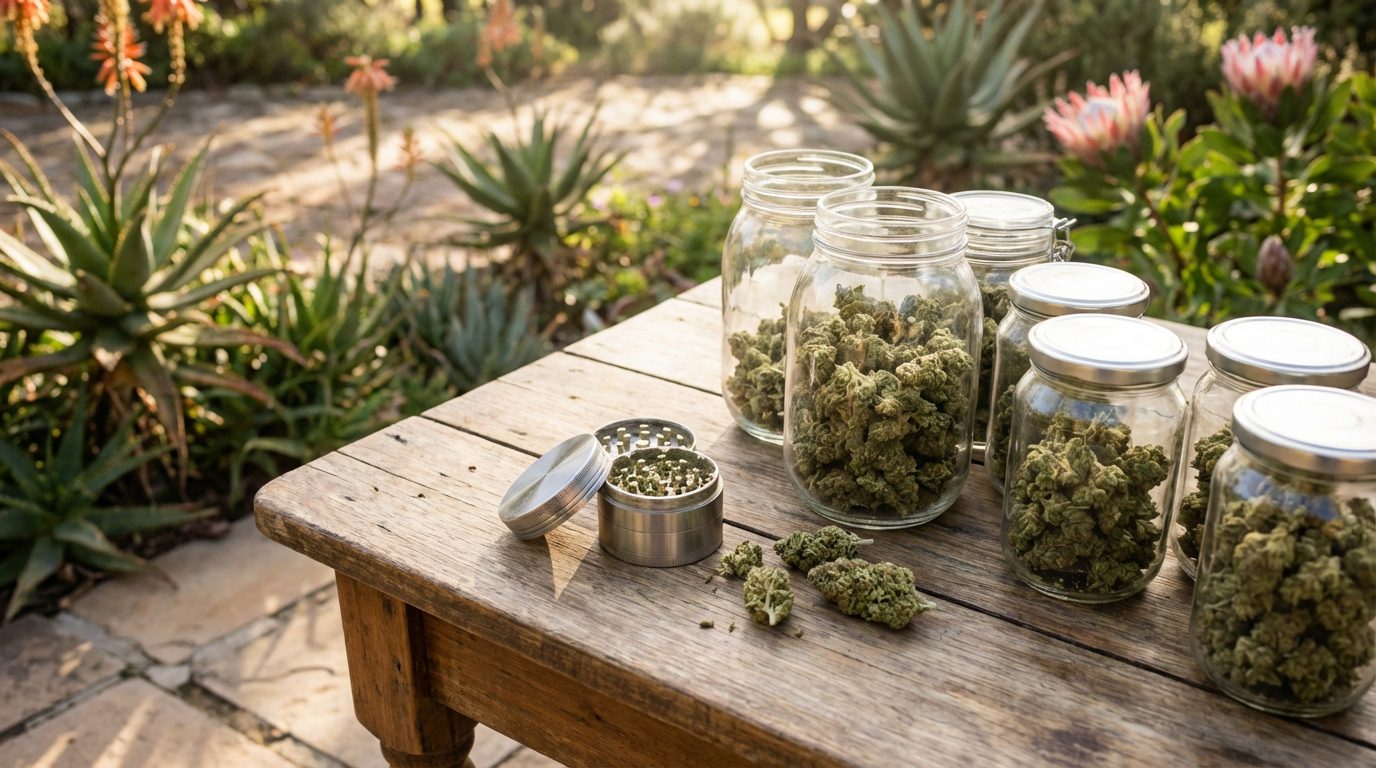
Once dried and trimmed, your buds go into airtight glass jars. This is curing. Think of it like aging fine wine or cheese. The remaining moisture in the centre of the bud redistributes to the exterior. For the first two weeks, open your jars daily for 15 to 30 minutes. This is called ‘burping.’ It releases built-up gases and replenishes oxygen, which is vital for the aerobic bacteria that help break down chlorophyll and other sugars. This process smoothens the smoke and brings out the complex bouquet of the strain.
DON’T: Forget the Hygrometer
Guesswork is the enemy of curing. If your jars are too wet (above 70% humidity), mould will strike, and your entire harvest belongs to the bin. If they are too dry (below 55%), the curing process stops completely and cannot be restarted. Place small digital hygrometers inside your curing jars. You are aiming for the sweet spot of 58% to 62% humidity. If it spikes, leave the lid off longer. If it drops too low too fast, you might need a humidity pack to stabilise it, though natural curing is always preferred if you can manage it.
Consumption Prep: Respecting the integrity of the Flower
DO: Mill, Don’t Crush
You have spent months growing, weeks drying, and more weeks curing. You have preserved those microscopic trichomes with the precision of a surgeon. Why, then, would you throw that pristine flower into a cheap plastic grinder with dull teeth that smashes, rips, and pulverises the structure? Traditional grinders often crush the herb, smearing the resin glands against the teeth and walls of the device rather than keeping them on the plant material where they belong.
To truly respect your harvest, you need a tool that understands the biology of the flower. This is where the Flower Mill, Next Gen Premium, 2.5 Stainless steel changes the game entirely. Unlike conventional grinders that use teeth to shred, the Flower Mill uses a rotor to gently roll the herb across a screen. The flower naturally crumbles where it wants to break apart, leaving stems behind and preserving the integrity of the fluffiest, most potent parts of the bud.
The difference is visible immediately. The output is lighter, fluffier, and significantly more voluminous because you haven’t compressed the life out of it. This milled texture allows for better airflow in joints and bowls, resulting in a cleaner, more even burn. Plus, the food-grade stainless steel construction ensures no micro-plastics or aluminium shavings end up in your smoke—a crucial ‘do’ for health-conscious connoisseurs. When you use the Flower Mill, Next Gen Premium, 2.5 Stainless steel, you aren’t just grinding weed; you are preparing it in a way that honours the months of labour you put into growing it. It is the final step in the quality control chain that ensures the flavour profile you nurtured is exactly what you taste on the exhale.
DON’T: Pre-Grind Your Entire Stash
It might be tempting to grind up a whole jar’s worth of weed for convenience, but resist the urge. Once the flower is broken down, the surface area increases exponentially, accelerating oxidation. Terpenes evaporate, and cannabinoids degrade into CBN (the sleepy cannabinoid) much faster. Only mill what you intend to smoke in that session. Keep the rest of your nugs whole and happy in their dark, cool jars. Freshly milled herb is always superior in flavour and effect.
Storage: Long-Term Preservation
DO: Keep it Cool and Dark
Light (UV radiation) and heat are the ultimate destroyers of potency. Storing your beautiful glass jars on a sunny windowsill is a crime against cannabis culture. Store your harvest in a cool cupboard or a dedicated drawer. If you want to get fancy, UV-blocking glass jars are a great investment, acting as sunglasses for your buds. For very long-term storage (over six months), vacuum sealing and freezing is an option, but be warned: freezing makes trichomes brittle, so you must handle frozen bags with extreme caution to avoid turning your buds into shake.
DON’T: Use Plastic Baggies
We have all moved past the high school days of receiving squashed buds in a sandwich bag. Plastic carries a static charge that pulls trichomes right off the flower. You will see the inside of the bag coated in ‘kief’ that should have been in your lungs. Furthermore, plastic is permeable; it lets air in and smell out. Your weed will dry out and lose its funk. Stick to glass or food-grade stainless steel containers. Your older self will thank you.
The Final Toke
Growing your own cannabis is one of the most rewarding hobbies you can undertake. There is a primal satisfaction in consuming something you nurtured from a seed. However, the difference between ‘homegrown’ that makes your friends polite but dismissive, and ‘homegrown’ that makes their eyes widen in disbelief, usually comes down to the post-harvest process. It is about discipline. It is about resisting the urge to rush.
By following these dos and don’ts, you ensure that every gram of your harvest reaches its full potential. From the moment the amber trichomes signal the chop, to the slow dark dry, the patient cure, and finally, the gentle milling process, every step matters. Treat your plants with respect, and they will return the favour with a smoke that is smooth, flavourful, and potent. After all, you didn’t come this far just to smoke hay. Happy harvesting.
Keywords: Homegrown, Cannabis Curing, Harvest Tips, Flower Mill, Cannabis Culture